How to Choose the Right Sandpaper for Car Paint Repair: P80 to P2000 Explained

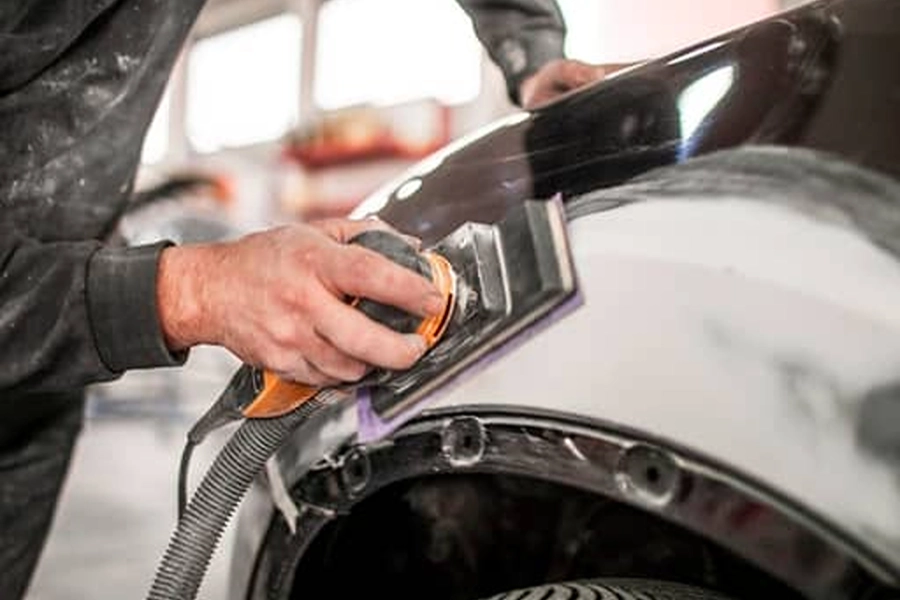
Choosing sandpaper for car paint repair can seem simple, until you actually have a damaged panel in front of you.
You see a scratch, peeling paint, or an area that needs to be refinished. You pick up a sanding disc and start working. Then you realize the surface is disappearing faster than expected, or the scratches left behind are going to create another problem later.
Working with a trusted abrasive manufacturer such as Aruida Abrasive helps you avoid these common sanding mistakes by matching the right grit and disc type to your project.
The grit number is the first thing to look at, but it is not the only thing that matters. The key is understanding what the grit is supposed to do at each stage of the repair.
Table of contents
- What Do Sandpaper Grit Numbers Actually Mean?
- Coarse Grit Cuts Faster—but Know When to Stop
- Do You Really Need to Use Every Grit?
- Choose the Right Grit for the Job
- Don’t Forget the Sanding Tool Itself
- Three Rules to Remember
- Conclusion
- FAQs
1. What Do Sandpaper Grit Numbers Actually Mean?
If you only remember one thing, remember this: lower number = coarser grit = faster cutting; higher number = finer grit = shallower scratches.
For example, P180 is coarser than P320. P180 removes material faster and leaves deeper scratches. P320 removes less material and leaves a finer surface.
That difference affects how fast you can work—and how much refining you will need afterward. In automotive repair, grit selection generally falls into two different stages.
- P80–P320 is mainly used for heavier material removal, such as shaping body filler, correcting repairs, or removing material during earlier stages.
- P400 and finer are more commonly used when refining automotive paint, sanding primer, or preparing a surface for the next finishing stage.
This distinction is important. A coarse grit can be extremely efficient when you need to remove material, but that does not mean it is the right choice for every stage of a paint repair. Think of grit as a tool for a specific job rather than a number you simply memorize.
2. Coarse Grit Cuts Faster—but Know When to Stop
Coarse grit is a tool for a stage, not a style. When there is a lot of material to remove, a coarse abrasive can save a significant amount of time. In the same amount of sanding time, it can remove considerably more material than a fine grit.
The trade-off is that coarse abrasives also create deeper scratches. That is exactly why coarse grit is useful during the early stages of a repair. When the main goal is to remove material efficiently, you want an abrasive that can cut quickly rather than one that leaves a very fine surface.
Fine grit works differently.
A finer abrasive creates shallower scratches and removes less material. That makes it much better for refining the surface, but much less efficient when you still have a lot of material to remove.
This becomes especially noticeable with very fine grits such as P1500 and above. They are useful for final refinement and delicate finishing work, but using them to do heavy sanding can make the process unnecessarily slow.
So the basic rule is simple:
Use coarse grit when you need cutting power. Use fine grit when you need surface refinement.
The challenge is knowing when to make that transition. That matters even more when you are working on automotive paint because the paint system itself can be surprisingly thin.
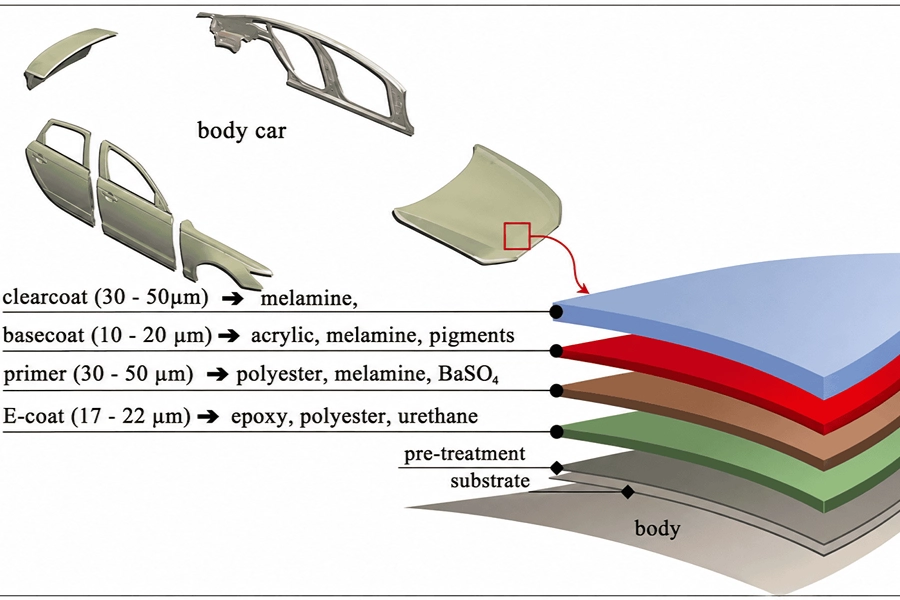
A typical automotive paint system may contain several layers:
| Paint Layer | Approximate Thickness |
| E-coat | ~20 μm |
| Primer | ~30–35 μm |
| Basecoat | ~15–25 μm |
| Clear coat | ~30–50 μm |
These numbers are only approximate, and actual thickness varies from vehicle to vehicle. But they illustrate an important point: you do not have unlimited material to work with. This is why you should not keep using coarse grit simply because it is faster.
As you get closer to the target surface, switch to a finer grit before you are almost through the paint. Leave enough material margin instead of waiting until the surface is nearly sanded through.
That small change in timing can make a big difference. Sanding too aggressively at the wrong stage can turn a simple repair into another repair.
The goal is not to stay with one grit for as long as possible. It is to use the cutting power of a coarse grit when you need it, then move to finer grits when surface control becomes more important.
3. Do You Really Need to Use Every Grit?
Small spot? You can often skip grit. Large panel? Don’t.
You do not always need to move through every grit number in sequence. The right progression depends partly on the size of the area you are sanding.
For a small repair spot—roughly 13 cm or less in both length and width, about the size of a 5-inch sanding disc—you can often move directly to a finer grit if the previous sanding stage has already removed most of the material.
Because the area is small, even a finer abrasive can finish the job relatively quickly. Changing grits too frequently may add more time than it saves, and constantly switching abrasives can also make it harder to maintain a consistent feel across the repair.
Large panels are different. If you are sanding an entire door, hood, roof, or another large area, working progressively from coarse to fine is usually much more efficient.
For example, a large automotive paint-sanding job may progress through:
P400 → P600 → P800 → P1000 → P1500
You do not necessarily need to use every step in every repair. The point is that the larger the sanding area, the more valuable a controlled grit progression becomes.
A coarse abrasive brings a large area under control quickly. Finer grits then refine the scratches from the previous stage and gradually prepare the surface for the next process.
The goal is not to use more sandpaper. The goal is to spend the least amount of time getting the surface to the condition you actually need.
4. Choose the Right Grit for the Job
Match the grit to the job, not to a number you memorized. Here is a practical starting point for common automotive sanding applications:
| Application | Starting Grit | Next Stage | Finishing Stage |
| Body filler | P80–P120 | P180–P240 | P320 |
| Paint defect removal / leveling | P240–P400 | P600 | Depends on the next process |
| Primer sanding | P400 | P600 | P800–P1000 |
| Headlight restoration | P320–P600 | P800–P1500 | P2000+ |
| Paint preparation | P400 | P600 | P800 |
These are starting ranges, not fixed rules for every vehicle or repair.
For example, body filler may require a relatively coarse abrasive because the main goal is shaping and removing material. If you are dealing with old or unwanted automotive paint, you may also need to remove the existing coating before refinishing; see our guide on how to remove paint from a car for more details. Once the shape is correct, the grit can be refined to reduce the depth of the sanding scratches.
Paint and primer are different. Once you are working on these layers, the objective increasingly becomes controlling the scratch pattern and creating a uniform surface for the next step.
Headlight restoration is another good example. The early stage may require enough cutting power to remove oxidation and surface damage. The later stages progressively refine the scratches until the surface is ready for polishing or the next finishing process.
P2000 and finer grits are typically reserved for final refinement before polishing, such as after headlight restoration or for very delicate finish work.
The important question is always:
What am I trying to remove right now, and what does the surface need to look like when I finish this step?
Answer that first, and the grit choice becomes much easier.
5. Don’t Forget the Sanding Tool Itself
On curves, the abrasive backing matters as much as the grit.
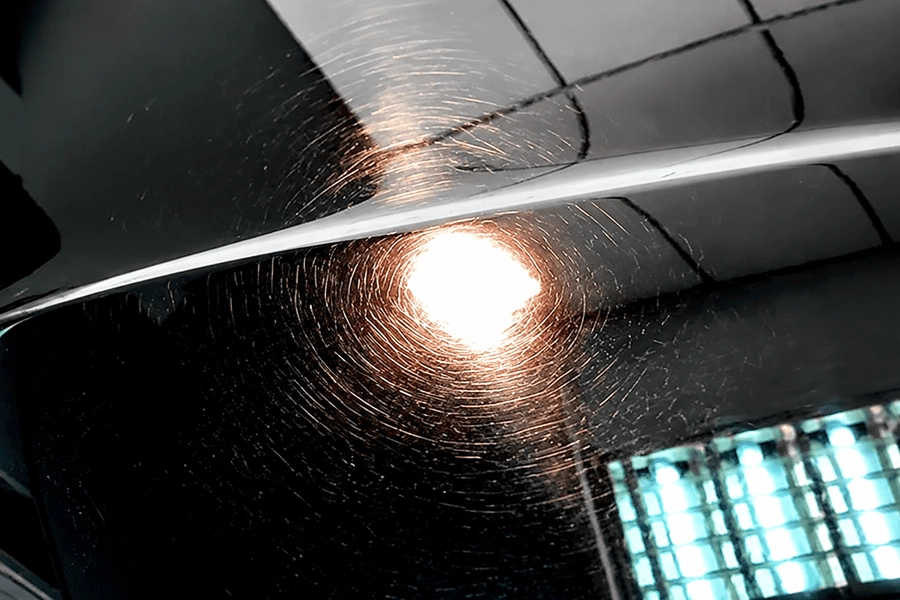
Automotive panels are rarely completely flat. Bumpers, fenders, door edges, body lines, and other curved areas can be difficult to sand evenly with a rigid backing. This is where soft foam sanding abrasives can have a major advantage.
Instead of staying completely flat against the workpiece, the flexible foam backing can deform slightly and follow the contour of the surface. That helps maintain more even contact across curved areas.
The result can be a more uniform sanding action, smoother transitions, and less effort from the person doing the work. On complicated curves, that better fit makes the whole process feel more controlled.
This is especially useful when working around bumpers, fenders, rounded edges, and other areas where a rigid abrasive does not naturally conform to the surface.
For machine sanding, the abrasive backing and hole pattern also matter. A suitable dust-extraction setup helps remove sanding dust from between the abrasive and the workpiece instead of allowing dust to remain in the sanding area.
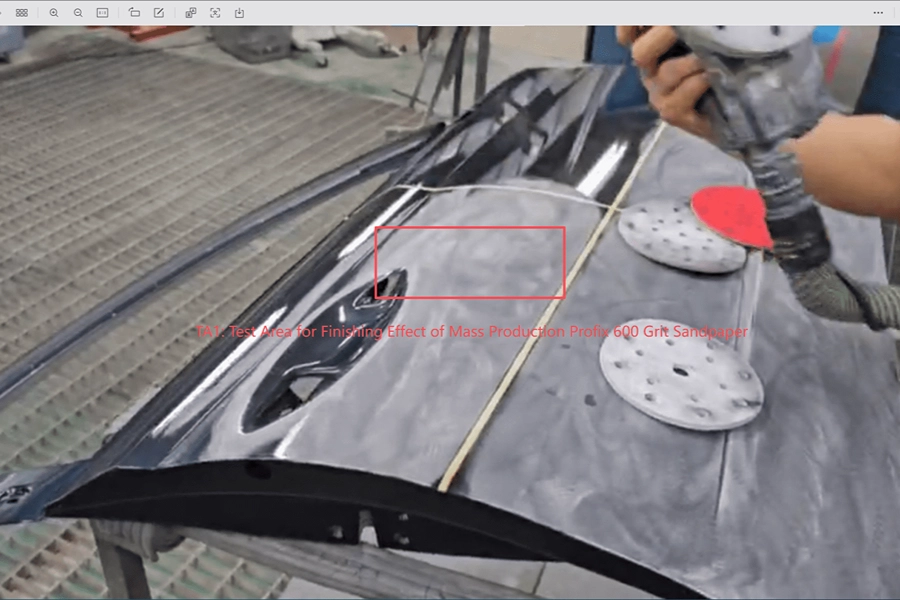
If swirl marks or unexpectedly deep scratches appear, check the process before simply changing the abrasive. Common things to look at include:
- Skipping too many grit stages on a large sanding area
- Applying excessive sanding pressure
- Poor dust extraction
- Dust remaining between the abrasive and the workpiece
A good abrasive can only work properly when the sanding process around it is also under control.
6. Three Rules to Remember
You do not need to memorize every sandpaper grit number to make better sanding decisions.
Just remember these three rules:
1. Know What the Grit Is Doing
Lower numbers cut faster and leave deeper scratches. Higher numbers cut more slowly and leave a finer surface.
2. Consider the Size of the Repair
A small spot can often skip a grit. A large panel usually benefits from a more controlled progression.
3. Do Not Wait Until You Are Almost Through the Paint
As you get closer to the final surface, switch to a finer grit early enough to leave a safe margin. Once you understand those three principles, choosing between P80, P180, P320, P600, P1000, P1500, or even P2000 becomes much less about memorizing a chart—and much more about knowing what your surface needs at that moment.
Conclusion
Choosing the right sandpaper for car paint repair is mainly about understanding what you need the abrasive to accomplish at each stage.
Coarse grits such as P80–P320 provide faster material removal, while finer grits such as P400 through P2000 progressively refine the surface and reduce scratch depth. The size of the repair, the material being sanded, the shape of the panel, and the next repair or finishing step should all influence your grit selection.
You do not need to memorize every grit number. Instead, focus on three things: how much material you need to remove, how refined the surface needs to be, and when it is time to move to a finer grit.
With the right grit progression and sanding process, you can work more efficiently while reducing the risk of unnecessary scratches, uneven surfaces, or sanding through the paint.
FAQs
What grit sandpaper should I use for car paint repair?
The right grit depends on the stage of the repair. Coarser grits such as P80–P320 are generally used for heavier material removal, while P400 and finer grits are commonly used for primer sanding, paint preparation, and surface refinement.
Is P80 too coarse for car paint?
P80 is very coarse and removes material quickly, so it is generally better suited to heavier material removal and shaping body filler than delicate paint finishing. Using a coarse grit on a paint surface requires care because it can leave deep scratches and remove material quickly.
What sandpaper grit should I use before painting a car?
A common starting range for paint preparation is P400, followed by finer grits such as P600 and P800 depending on the surface and the next stage of the repair. The appropriate progression depends on the paint system and the condition of the surface.
Do I need to use every sandpaper grit?
No. You do not necessarily need to use every grit in sequence. Small repair areas can sometimes skip a grit when the previous stage has already achieved the desired surface condition. Larger panels generally benefit from a more controlled progression through the grits.
What is P2000 sandpaper used for?
P2000 is a very fine abrasive generally used for final surface refinement and delicate finishing work. It can be useful before polishing, including during the later stages of headlight restoration or other applications where a very fine scratch pattern is needed.
Is higher grit sandpaper better for car paint?
Not necessarily. Higher grit means a finer abrasive, not that it is better for every job. Coarser grits are more effective when you need to remove material, while finer grits are better when you need to refine the surface and reduce sanding scratches.
Should I use foam-backed sandpaper on curved car panels?
Foam-backed abrasives can be particularly useful on curved automotive panels because their flexible backing can conform more easily to the shape of the surface. This can help provide more even contact and a more consistent sanding result.